Love. Make. Think.
Felting, sewing, making, creating, baking, reading and the occasional thought.
Wednesday, 8 May 2013
HeartFelt Silks Blog: Wonderful Felt Art by Friends of HeartFelt Silks -...
HeartFelt Silks Blog: Wonderful Felt Art by Friends of HeartFelt Silks -...: Today we are starting a new series on the blog where we will be sharing with you the artwork of our feltmaker-friends from around the world....
Friday, 30 November 2012
Saturday, 24 November 2012
Monday, 23 July 2012
Art In The Park.
Well I did it!
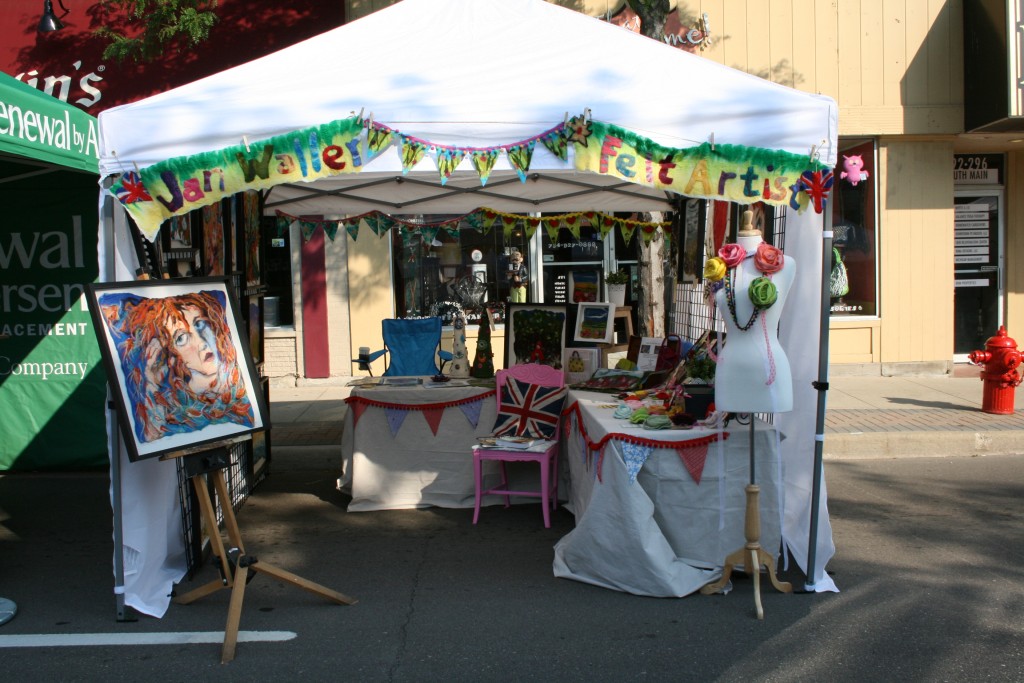
My first ever US Art Fair, 3 very hot days on Main Street in Plymouth MI.
Months of planning and making all came together. I want to say a big thank you to some people for helping me get there... because it's never just one person is it?
My Hub Mark, who listened to every worry and fret, told me it was all going to be OK, fed the kids when I was off Mum duty, made sure the booth didn't fall down and made all my frames for the wall hangings.... thank you sweet man. I love you.
Leesa, who sat with me for 3 days, held the booth up when we thought it was going to fall down and has so many good ideas regarding how to make my business better. Leesa, we have only known each other a short time, but you are so generous of spirit. It is so lovely to have a friend like you.
Denise, without meeting you I would never have done it. NEVER.
My book club for coming out to see me and making purchases, you didn't have to and you did anyway, you are wonderful women.
Julia, for looking after Issie, such a help to know that my child is fine and sorted, thank you.
My Facebook community for all your well wishes and words of encouragement. You are the tops.
My friends far away, Ana, Helen, Astrid, Julia, Mary, Lizzie, Inken, Jackie, Sian, Sam. You truly keep me going, your support and belief in me is so very very precious.
Lastly my kids, Cam and Is, who just had no mother for the first 4 weeks of the summer holidays and managed to (mostly) get on, and make Lego films, and play and feed themselves and offer help. You two amaze me everyday.
To everyone that came to my booth and stopped to talk and ask questions. Hello! It was great to meet you, talk felt with you :)
And so we are onwards and upwards.
Please don't forget that I am collecting real life messages of love for my ArtPrize 2012 entry, you can read more about it on my blog post here.
If you are local to Plymouth, Michigan why not come and learn to felt with me in my studio at the bottom of my garden? There's more information here.
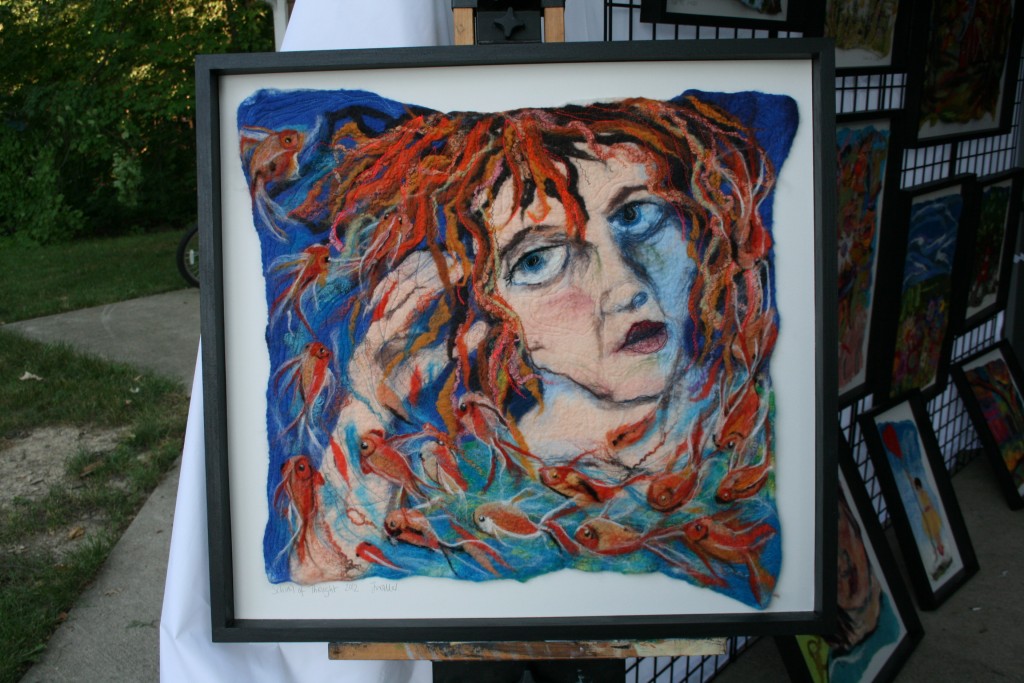
I also have some great news, you will be able to see my piece "School of Thought" at the Northville Art House next month in their "Thoughts with Fiber" exhibition, opening night is 3rd August.
Well I have a lot of work to do. Stay tuned for Art Prize updates!!
Jan xxxxxxx
How To Make Felt Rose
This was originally a tutorial on Instagram!
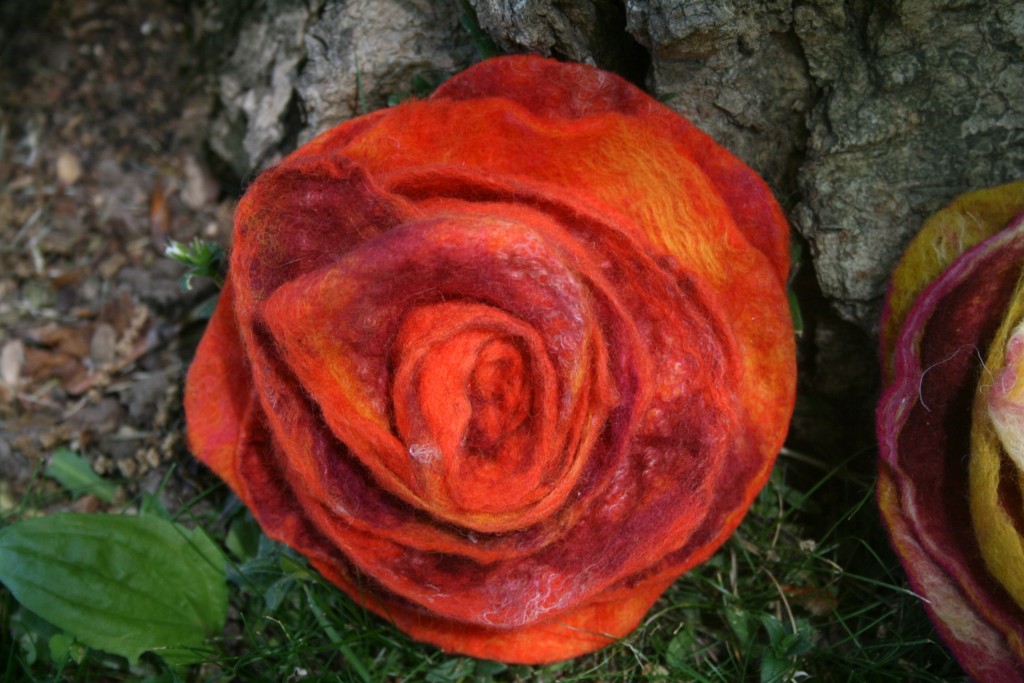
Making felt roses is very very easy. I have two ways of making them, either by creating a spiral, or upcycling a felt coaster thats not quite up to scratch. You can see my tutorial for making spiral roses here. Since I wrote that tutorial I have learnt to needle felt, so instead of sewing you can easily needle felt the spiral rose together.
The rose I'm going to show you today requires you to make a piece of flat felt, I showed you how to do this in this post.
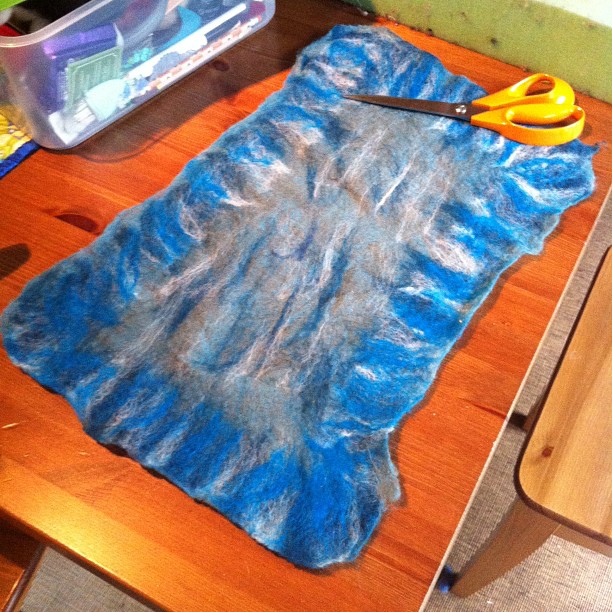
You need to start by making a piece of flat felt in the colour of your choosing. I make my pieces quite big as I like to have scraps to play with or use as pre felt, but you can make a piece aprox 20 x 30 cm. make sure you add highlighting colours and darker tones.I also like to add silks, but I'm a masochist.
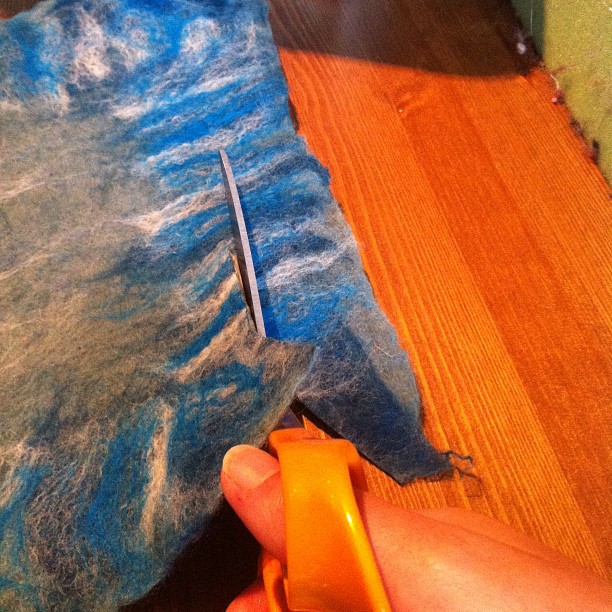
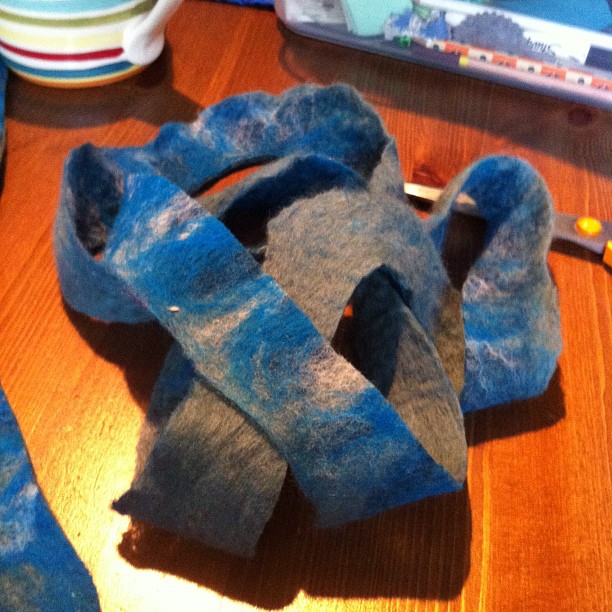
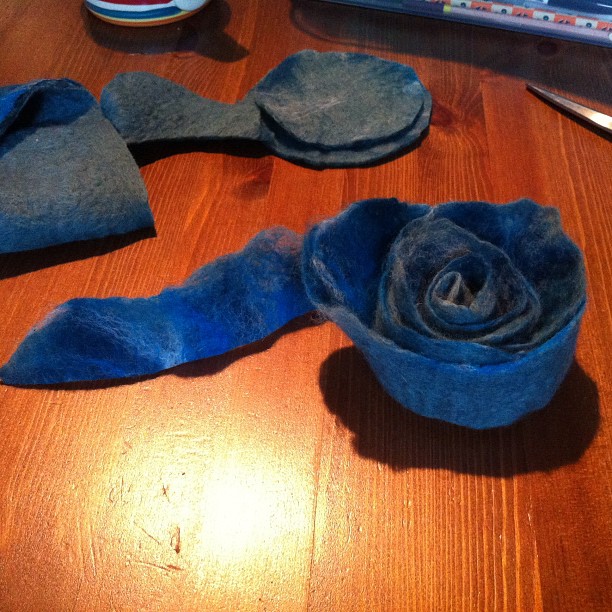
Now cut all the way around the outside about 2/3cm width so you get that nice wibbly wobbly outer edge, don't worry about cutting straight, cut in one long continuous line.
So you end up with this.
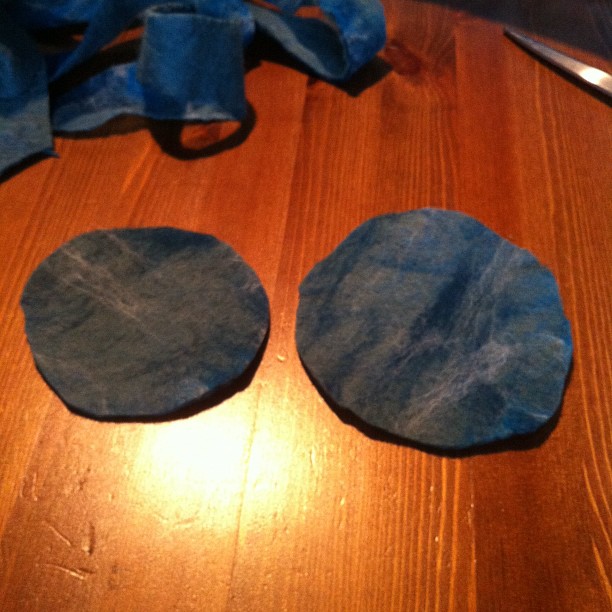
Next, cut two sort of circles from the remaining flat piece. Size is up to you, but I wouldn't make them smaller than 7cm. Make one slightly bigger than the other , and don't try and make them perfect circles, we want them wibbly wobbly because nature is wibbly wobbly.
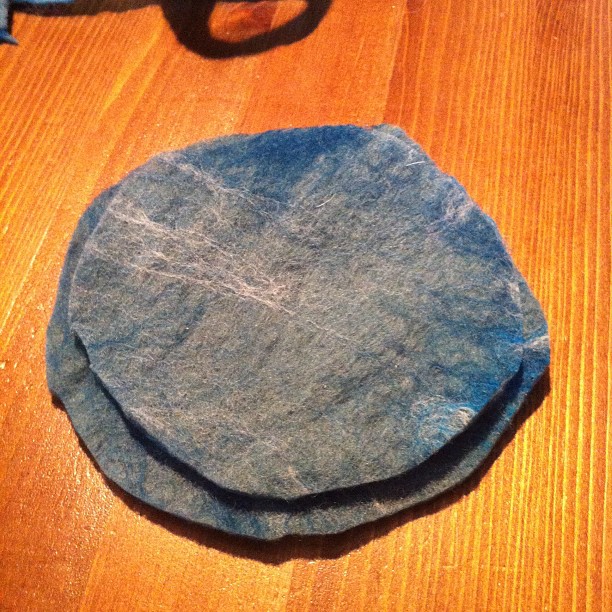
You can needle felt these to each other.
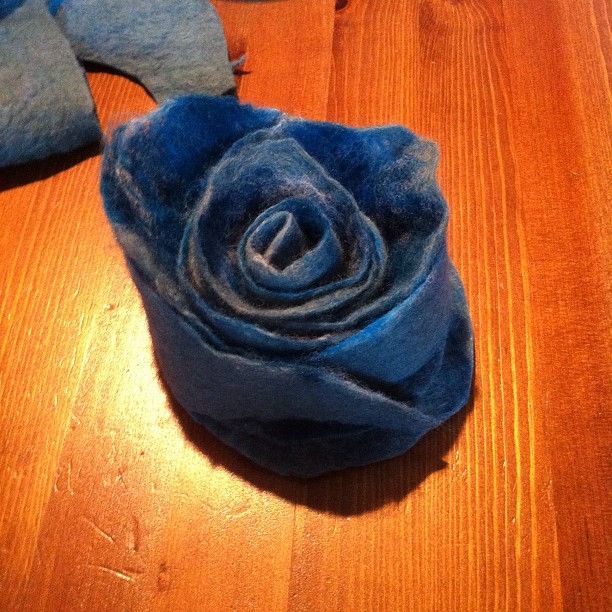
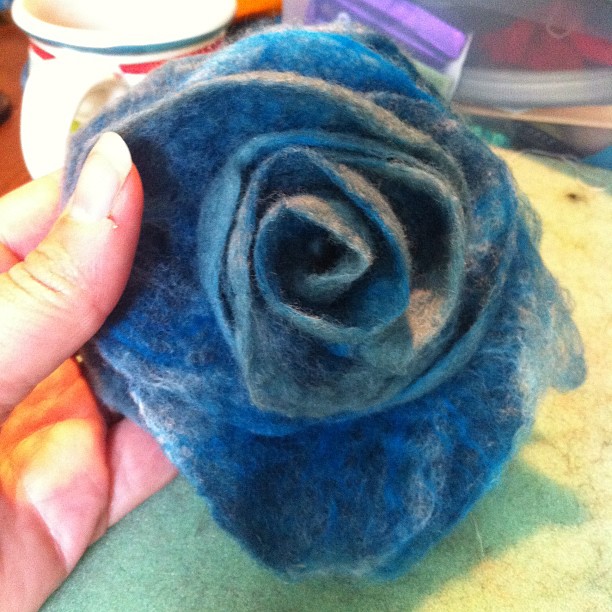
Now loosely (v.important) coil the outer edge up. You can see how the lovely irregular edges give the rose a natural feel.
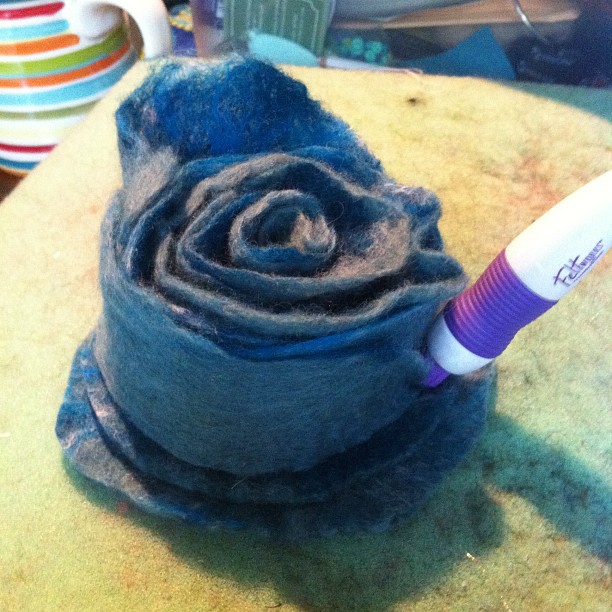
Place this on top of your two circles. Now it's time to get some serious needle felting done.
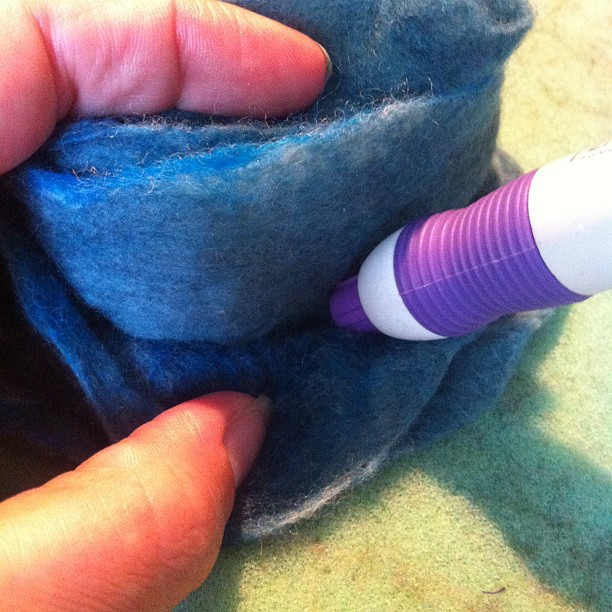
Using a coarse needle, you are now going to stab stab stab and needle felt the coiled felt to the circles beneath. Work from the outside in, this will make the rose "petals" lean back and again give it a more natural feel.
It's hard to say how much you should needlefelt, you want to make sure your rose is secure, but beyond that it's up to you. I've found the more you work into it the more sculptural it becomes, so really stop when you are pleased with how it's looking. When I'm happy with it, I sew into the back, working in a spiral to the centre just to make sure the piece is secure, this also scripts the piece. Then you can either add a brooch pin, or a barrette or add it to an Alice band. You could even add some nice leaves. Easy peasy.
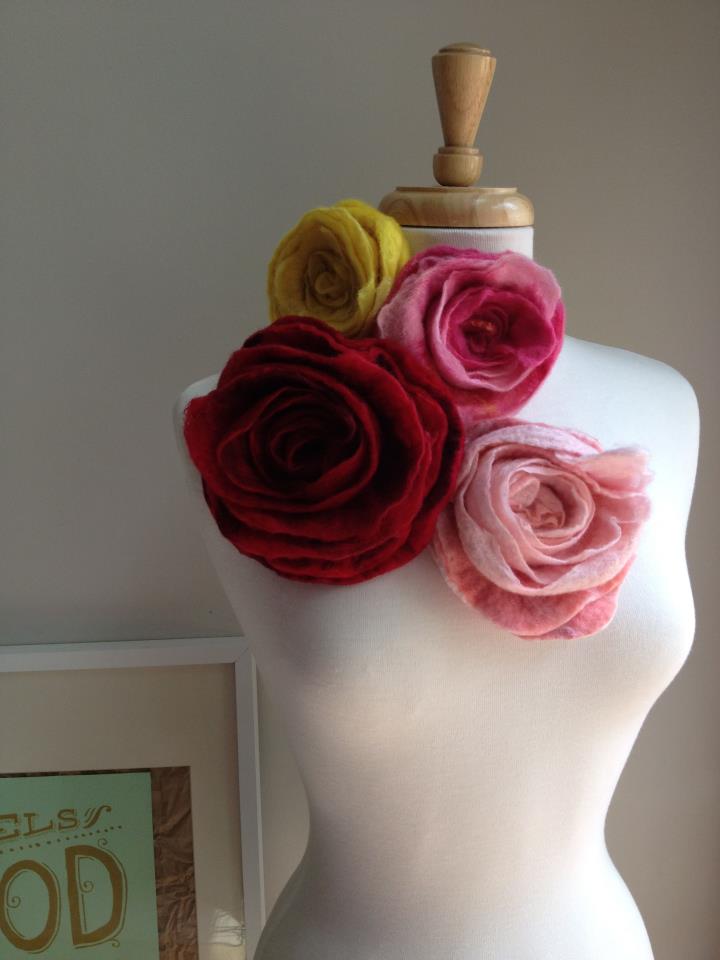
I love making these roses, they look lovely on summer jackets and winter coats, great on denim and very special in your hair. They work in all sorts of colours, your only limit is your imagination. I'm sure these would work with shop bought wool felt or a felted old sweater!
Enjoy making these roses! if you do make one, please send me a picture!
Happy Days!
Jan xxxxx
Labels:
accessories,
brooch,
corsage,
craft,
felt,
felt accessories,
felt artist,
felt rose corsage,
fiber,
fibre,
hand made,
hand made felt,
how to make,
Jan Waller,
needle felt,
needle felting,
pin,
rose,
roses,
wet felting
Subscribe to:
Comments (Atom)
Love. Make. Think.
Felting, sewing, making, creating, baking, reading and the occasional thought.

What Do You Get When You Fall In Love?

A whole lot of trouble.......

Times two.
